
And so it begins…
This is the first post in a series of posts introducing Decision Games‘ Grand Operational Simulation Series (GOSS). I picked for this purpose Hurtgen: Hell’s Forest, the second game in the series. I have never played this game nor do I have any particular GOSS experience.
Wait…what?
As mentioned in my last post I would like to cover the steps between unboxing a game and reviewing a game. I want to focus on questions like: What is the game about and what does it try to achieve? How well are the rules written? What does it take to learn the game? How much time and effort do you have to invest to get the game to your table? What can you expect from your first game? Was it worth it? etc.
I hope that if you don’t know GOSS or if you are not sure if this particular game is for you, my posts might be of some help. Also, let me know if you have a particular question that you think I should try to answer.
Why GOSS?
When I first came across GOSS I was intrigued by the advertised level of detail for combat and supply (I will talk more about what particularly attracted me to GOSS in a later post.). Yet, reading through the BGG comments, there didn’t seem to be a consensus on the game system. On the contrary, opinions couldn’t be more divided. You either love GOSS or you hate it. So I decided that I had to find out on my own. I received my copy of Hurtgen: Hell’s Forest just a few weeks ago (Not sure if he will ever read this, but thanks a lot to Jochen for blocking quite some space in his luggage for the game, when he came over from Europe.).
I know that there is some risk involved. After all, the game is not exactly cheap and I might have flushed quite a bit money down the toilet. But for now, I try to take a positive approach and refuse to believe that GOSS is a complete disaster.
With this intro out of the way, let’s start…
Hurtgen: Hell’s Forest
Hurtgen: Hell’s Forest (HHF) simulates the battle fought between American and German forces from September until December 1944 in the area of Hurtgen Forest (German: Hürtgenwald) to the southeast of Aachen. It’s the longest battle fought on German ground during World War II. It resulted in heavy losses on both sides and eventually left the Allies defeated.

HHF was published in 2012 and is the second game in the Grand Operational Simulation Series (The first being Wacht am Rhein from 2005).
Overview
I made my way through the first part of the rules booklet. It took me a few hours. But then, I was rather distracted recently and probably could have been faster. This first part covers among other things modes, movement and line-of-sight.
The rules so far are not overly complicated. There are no ‘What the f…’-passages. There’s nothing really out of the ordinary. But it is pretty detailed, meaning, it’s quite a lot to digest, at least when compared to other games. Let me go through some points that I think are worthwhile to mention. It should give you an idea what you are dealing with rather than being a rules summary. In future posts I might be discussing some of the rules in detail.
Rules Version
I should probably also mention that according to posts on consimworld a new version is about to be published?! I assume this will coincide with the release of the new GOSS title Lucky Forward: Patton’s Third Army in Lorraine.
Scale
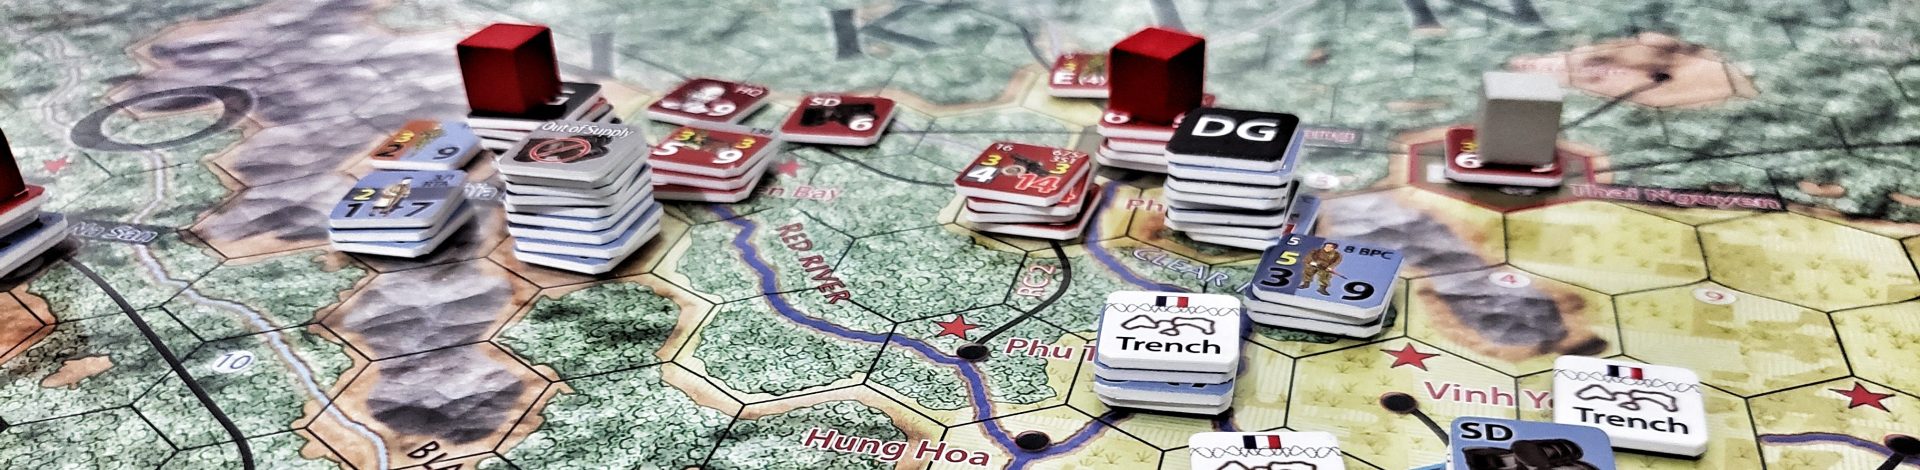
Map hexes are approximately one mile in diameter. Unit counters depict usually battalions or companies. The steps of each unit are equivalent to the number of companies. Step losses are shown by flipping the counter. In the case of three-step units, additional step losses are marked with ace-of-spades counters. And yes, there are also Zero-step Units.
Terrain
You have your regular terrain type hexes like Clear, Rough, Woods, Forest, etc. Hexes can be separated by rivers. Roads and bridges on the other side connect hexes.
Two terrain features are introduced that I was not familiar with:
Constricted Terrain is indicated by dashed lines connecting hexsides. Those lines signal elevation differences. Imagine contour lines but at a rather fine granularity. Not only does Constricted Terrain reduce the stacking limit in that particular hex, movement is hindered if you do not move along the dashed lines, meaning, if you don’t enter and leave the hex through hexsides that are connected by a dashed line. If not on a road Artillery units can’t enter Constricted Terrain at all.
Covering Terrain (CT) comes in two flavors. Moverment CT (MCT) makes it ‘easier’ to move near adjacent enemy units. Observation CT (OCT) makes it harder to observe stationary units.
Game Days, Game Turns and Sequence of Play
The game follows historical dates. Each Game Day (GD) is divided in three Game Turns (GT): AM, PM, Night. Night turns can be extended to accommodate additional activities (Extended Night Activities (ENA)).
One of the GTs is designated as Rest Game Turn during which actions are limited. For the allies this is the Night GT, whereas the German side records secretly at the beginning of each GD which GT should be allocated for rest. Obviously solo players will need to ‘house rule’ this use of hidden information.
Each GT follows a fixed Sequence of Play (SoP). The SoP is rather involved and goes well beyond the IGO-UGO approach. I won’t go into details here and refer you to the very useful extended SoP that you can download from BGG.
Modes
Each unit is always in one of four modes. A mode represents a unit’s preparedness for certain actions. If you have played BCS or OCS the concept of modes should be familiar. Modes are changed once per GT during the Mode Determination Phase and units are usually marked with the corresponding mode counter. GOSS uses the following modes:
Tactical Mode is the default mode and thus does not require an additional marker. You switch your unit into Tactical Mode if you want maximal mobility (all movement types allowed, see below) yet want to retain some combat ability.
Prepared Assault Mode is kind of the opposite of the Tactical Mode. Attack capabilities (including Advance after Combat) are maximized for the price of limited mobility.
Exploitation Mode allows you to act during your corresponding Exploitation Phases of the GT. With some exceptions (recon units) only complete formations, not individual units, can be put in Exploitation Mode. And they have to act together in the same phase.
Maneuver Reserve Mode is like the Exploitation Mode a mode that affects a complete formation. When released out of Maneuver Reserve Mode (MR) after at least nine (!) consecutive GTs units will benefit for two GTs from movement as well as combat bonuses (boni?).
As you can imagine, the four modes give you a variety of tactical options and each GT requires a careful planning.
Movement
No surprises here. Each unit has a Movement Allowance (MA). You pay Movement Points (MP) for terrain up to your MA. Command status, fuel status, and fatigue level affect the MA.
Units come in two movement classes: Leg Units (LU) and Mechanized Units (MU). Tracked, wheeled and horse-drawn units fall all into the latter category. Some units can change their movement class, namely when you mechanize your LU or when MUs dismount.

With some exceptions movement happens individually and not in stacks. Units can pick one of four movement types. Movement types cannot be changed within one movement phase:
Strategic Movement allows MU in Tactical Mode to cover longer distances along roads (!). LUs need to use trucks to execute a Strategic Movement.
Tactical Movement Road is again for MUs or mechanized LUs. And like the name suggests it describes the movement along any sort of road. Units need to follow a continuous road. That means you can only change roads if they cross. Two roads being in the same hex is not enough (no jumping!). Unlike Strategic Movement, Tactical Road Movement allows MU to move adjacent to enemy units.
Tactical Movement Non-road You use this mode to move ‘off-road’.
Prepared Assault Movement is the only movement type that doesn’t require the spending of MP. Instead, LUs can move one hex, all other units can move two hexes.
Simulating movement is usually not something that’s being discussed. But think about what it actually tries to achieve. It maps continuous actions that happen simultaneously with a series of discrete and static steps that are executed consecutively. Game designers need to make some abstraction choices to keep movement realistic. Especially the issue of simultaneity becomes more and more crucial the smaller the scale, and the shorter a game turn. GOSS does two things to keep unrealistic situations to a minimum:
- While stacking is only enforced at the end of each phase, MUs, using Road Movement, pay extra to enter a hex with another (friendly) MU and must end their move in that hex. Road Movement is forbidden for MU into or out of a hex that contains already two other MUs. Furthermore, units using Strategic Movement can’t enter a hex that contains another MU and MUs using any other kind of movement can’t enter a hex containing a unit that is marked with a Strategic Movement marker. Sounds complicated? Well, it’s not. It basically describes that MUs can’t just jump off the road willy-nilly to make space for some other unit passing through.
- Also units move in a fixed order: First all units that use Strategic Movement, followed by Tactical Road Movement, then Tactical Non-road Movement, and finally Prepared Assault Movement.
The movement rules clock in at seven pages and are quite detailed. Don’t be surprised to find rules for the Dismount Procedure or Horse-drawn Artillery. But to be fair, while it does look like it could be a fiddly system, I was more under the impression that everything is very procedural and it just needs some practice. Well, I will see very soon if that is an overly optimistic view.
Line of Sight, Visibility
Instead of repeating the rules for Line of Sight (LoS) I post below a sketch that is taken from the rulebook. Don’t worry, I won’t go into the details. Instead I want to use this as an example: Yes, at a first glance the sketch does look like it might trigger a migraine. But it is actually quite well done. It condenses the LoS rules in a single figure. In the rulebook the sketch is followed by a comprehensive explanation guiding the reader.

I read several comments that the GOSS rulebook is horrible. Well, when it comes to those example figures the rulebook does everything right. And there are quite a few of those.
Things not covered here
As I said before, there’s no way I can go into all rule details. And I rather leave some discussion of particular rules for dedicated posts. So, we’ll talk about rules for Green Divisions, Commandos, Rangers, Engineers, Headquarters and Command, Supply, etc. at a later point.
Concluding Thoughts
This first part of the rule booklet is neither complicated, nor complex. It just makes sense. The writing style is pleasant and everything is introduced at a very slow pace (which is not meant to mean boring). Here and there designer notes clarify rules or give additional information. I have yet to encounter ambiguities or unclear rules. However, the rules are not flawless. For example, introducing Tactical Road Movement as one of four movement types but later on calling it only Road Movement is a slightly annoying and unnecessary oversight.
With all that being said, the rules are very detailed. Already now I’m wondering how to memorize all of this. I have no illusion that this will change when I get to the more critical rules like rules for combat. I’m curious how well the player aids are designed and if I will have to create my own crib sheets.
What’s Next?
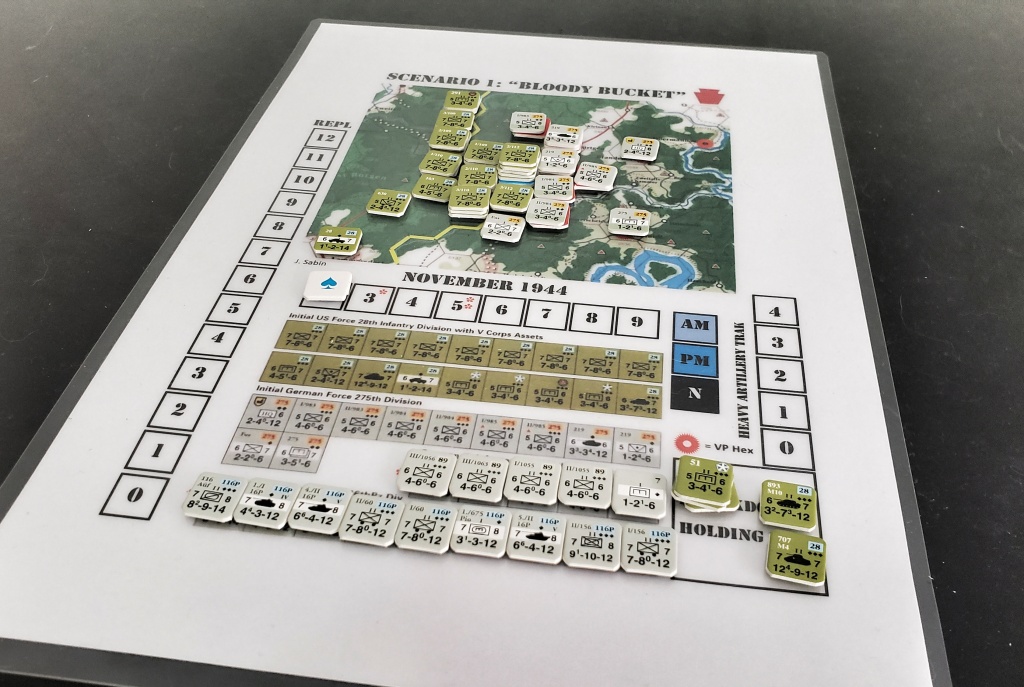
Before coming to part 2 of the rules overview, I’d like to cover in a post some of the box content. As you can see I started punching the counters (Not everyone was super happy with me doing this.).

There’s a bunch of charts and tables that give you a feeling for the breadth of the game system without the headache of going into the rules.
And yes, I also started re-hearsing and putting the rules to a test with the beginner’s scenario ‘The Bloody Bucket’. I’ll summarize my first impressions in a later post.
As you can see, I do have a list of ideas for posts that will keep me busy. I still have to figure out how frequently I can make posts here. In parallel I’m working on some sort editorial calendar (Is that a thing?) to plan and streamline posts. And as I mentioned before, let me know if you have any suggestions and/or questions.
Abraços,
Carsten
Change Log
2020-03-31: Removed a sentence in which I falsely claim that during day GTs Movement Allowance is halved. This is of course not true. MA is halved when in Exploitation Mode. Thanks a lot to Alexandre for catching this mistake!

Just a small correction if I may. You state that “And since day GTs are shorter than the night GT, MA is also halved during day GTs…” Movement is only halved WHEN in Exploitation mode. During Friendly Movement Phase you have full MA.
LikeLike
Hi Alexandre, thanks a lot for your feedback! You are absolutely right! Not sure how that sneaked in there. I’ll correct that part! Again, thanks a lot!
LikeLike
With this kind of complexity, with all the rules and parameters we need to juggle, it’s very easy to miss something you wrote while trying to be as concise as possible isn´t completely true or that something may be missing, and even when re-reading your mind tens to just fill the blanks and you won’t see it. Anyway Great effort and you present very cool summaries of some rules, which is actually a great starting point to then read the full rules. I’m just finishing the rules concerning movement, so still a lot to dig in and crunch.
LikeLiked by 1 person
Thank you for your kind words!
LikeLike